Flip your device for landscape for a better view
Colour
Layout
Base cabinets
Worktop
Tool panel
Wall cabinets
Extras
Roller cabinet
Drawer contents
Accessories
0%
Rotate
.
Colour
.
Layout
Layout

Straight layout
Number of base cabinets
Determine how many base cabinets you need for your workshop. More cabinets mean more storage space and a larger work area.
1 cabinet
2 cabinets
3 cabinets
4 cabinets
5 cabinets
6 cabinets
7 cabinets
8 cabinets
.
Base cabinets
Cabinet selection
Choose which base cabinet you want to place at each position. Use the numbers at the top to switch between positions and customise each cabinet individually. This allows you to create a layout that perfectly suits your needs.
Disclaimer
If you choose ‘No cabinet’, the cabinet at that position will be removed. Please note that the worktop may not be sufficiently supported as a result.
If multiple positions are left without a cabinet, a support frame will automatically be added for additional stability.

No cabinet

Storage cabinet

Tool cabinet 5 drawers

Tool cabinet 7 drawers

Bin with paper roll holder

Storage cabinet with sink and tap

Tool cabinet XL

High cabinet 1 door

High cabinet 2 doors

Shelving unit 68 cm

Shelving unit 120 cm
Cabinet selection
Choose which base cabinet you want to place at each position. Use the numbers at the top to switch between positions and customise each cabinet individually. This allows you to create a layout that perfectly suits your needs.
Disclaimer
If you choose ‘No cabinet’, the cabinet at that position will be removed. Please note that the worktop may not be sufficiently supported as a result.
If multiple positions are left without a cabinet, a support frame will automatically be added for additional stability.
No cabinet
Storage cabinet
Tool cabinet 5 drawers
Tool cabinet 7 drawers
Bin with paper roll holder
Storage cabinet with sink and tap
Tool cabinet XL
High cabinet 1 door
High cabinet 2 doors
Shelving unit 68 cm
Shelving unit 120 cm
Cabinet selection
Choose which base cabinet you want to place at each position. Use the numbers at the top to switch between positions and customise each cabinet individually. This allows you to create a layout that perfectly suits your needs.
Disclaimer
If you choose ‘No cabinet’, the cabinet at that position will be removed. Please note that the worktop may not be sufficiently supported as a result.
If multiple positions are left without a cabinet, a support frame will automatically be added for additional stability.
No cabinet
Storage cabinet
Tool cabinet 5 drawers
Tool cabinet 7 drawers
Bin with paper roll holder
Storage cabinet with sink and tap
Tool cabinet XL
High cabinet 1 door
High cabinet 2 doors
Shelving unit 68 cm
Shelving unit 120 cm
Cabinet selection
Choose which base cabinet you want to place at each position. Use the numbers at the top to switch between positions and customise each cabinet individually. This allows you to create a layout that perfectly suits your needs.
Disclaimer
If you choose ‘No cabinet’, the cabinet at that position will be removed. Please note that the worktop may not be sufficiently supported as a result.
If multiple positions are left without a cabinet, a support frame will automatically be added for additional stability.
No cabinet
Storage cabinet
Tool cabinet 5 drawers
Tool cabinet 7 drawers
Bin with paper roll holder
Storage cabinet with sink and tap
Tool cabinet XL
High cabinet 1 door
High cabinet 2 doors
Shelving unit 68 cm
Shelving unit 120 cm
Cabinet selection
Choose which base cabinet you want to place at each position. Use the numbers at the top to switch between positions and customise each cabinet individually. This allows you to create a layout that perfectly suits your needs.
Disclaimer
If you choose ‘No cabinet’, the cabinet at that position will be removed. Please note that the worktop may not be sufficiently supported as a result.
If multiple positions are left without a cabinet, a support frame will automatically be added for additional stability.
No cabinet
Storage cabinet
Tool cabinet 5 drawers
Tool cabinet 7 drawers
Bin with paper roll holder
Storage cabinet with sink and tap
Tool cabinet XL
High cabinet 1 door
High cabinet 2 doors
Shelving unit 68 cm
Shelving unit 120 cm
Cabinet selection
Choose which base cabinet you want to place at each position. Use the numbers at the top to switch between positions and customise each cabinet individually. This allows you to create a layout that perfectly suits your needs.
Disclaimer
If you choose ‘No cabinet’, the cabinet at that position will be removed. Please note that the worktop may not be sufficiently supported as a result.
If multiple positions are left without a cabinet, a support frame will automatically be added for additional stability.
No cabinet
Storage cabinet
Tool cabinet 5 drawers
Tool cabinet 7 drawers
Bin with paper roll holder
Storage cabinet with sink and tap
Tool cabinet XL
High cabinet 1 door
High cabinet 2 doors
Shelving unit 68 cm
Shelving unit 120 cm
Cabinet selection
Choose which base cabinet you want to place at each position. Use the numbers at the top to switch between positions and customise each cabinet individually. This allows you to create a layout that perfectly suits your needs.
Disclaimer
If you choose ‘No cabinet’, the cabinet at that position will be removed. Please note that the worktop may not be sufficiently supported as a result.
If multiple positions are left without a cabinet, a support frame will automatically be added for additional stability.
No cabinet
Storage cabinet
Tool cabinet 5 drawers
Tool cabinet 7 drawers
Bin with paper roll holder
Storage cabinet with sink and tap
Tool cabinet XL
High cabinet 1 door
High cabinet 2 doors
Shelving unit 68 cm
Shelving unit 120 cm
Cabinet selection
Choose which base cabinet you want to place at each position. Use the numbers at the top to switch between positions and customise each cabinet individually. This allows you to create a layout that perfectly suits your needs.
Disclaimer
If you choose ‘No cabinet’, the cabinet at that position will be removed. Please note that the worktop may not be sufficiently supported as a result.
If multiple positions are left without a cabinet, a support frame will automatically be added for additional stability.
No cabinet
Storage cabinet
Tool cabinet 5 drawers
Tool cabinet 7 drawers
Bin with paper roll holder
Storage cabinet with sink and tap
Tool cabinet XL
High cabinet 1 door
High cabinet 2 doors
Shelving unit 68 cm
Shelving unit 120 cm
.
Worktop
Worktop
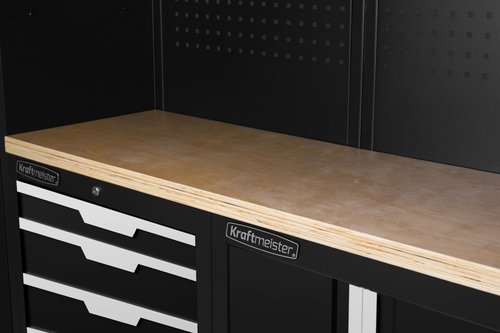
Multiplex

Stainless steel
.
Tool panel
Tool panel type
Choose the type of tool panel that best suits your workspace. The perforated panel is suitable for hooks and other accessories. Any power outlets are always supplied with the correct plug type.
No tool panel

Tool panel

Tool panel with power outlet
Tool panel type
Choose the type of tool panel that best suits your workspace. The perforated panel is suitable for hooks and other accessories. Any power outlets are always supplied with the correct plug type.
No tool panel
Tool panel
Tool panel with power outlet
Tool panel type
Choose the type of tool panel that best suits your workspace. The perforated panel is suitable for hooks and other accessories. Any power outlets are always supplied with the correct plug type.
No tool panel
Tool panel
Tool panel with power outlet
Tool panel type
Choose the type of tool panel that best suits your workspace. The perforated panel is suitable for hooks and other accessories. Any power outlets are always supplied with the correct plug type.
No tool panel
Tool panel
Tool panel with power outlet
Tool panel type
Choose the type of tool panel that best suits your workspace. The perforated panel is suitable for hooks and other accessories. Any power outlets are always supplied with the correct plug type.
No tool panel
Tool panel
Tool panel with power outlet
Tool panel type
Choose the type of tool panel that best suits your workspace. The perforated panel is suitable for hooks and other accessories. Any power outlets are always supplied with the correct plug type.
No tool panel
Tool panel
Tool panel with power outlet
Tool panel type
Choose the type of tool panel that best suits your workspace. The perforated panel is suitable for hooks and other accessories. Any power outlets are always supplied with the correct plug type.
No tool panel
Tool panel
Tool panel with power outlet
Tool panel type
Choose the type of tool panel that best suits your workspace. The perforated panel is suitable for hooks and other accessories. Any power outlets are always supplied with the correct plug type.
No tool panel
Tool panel
Tool panel with power outlet
Tool panel type
Choose the type of tool panel that best suits your workspace. The perforated panel is suitable for hooks and other accessories. Any power outlets are always supplied with the correct plug type.
No tool panel
Tool panel
Tool panel with power outlet
Tool panel type
Choose the type of tool panel that best suits your workspace. The perforated panel is suitable for hooks and other accessories. Any power outlets are always supplied with the correct plug type.
No tool panel
Tool panel
Tool panel with power outlet
Tool panel type
Choose the type of tool panel that best suits your workspace. The perforated panel is suitable for hooks and other accessories. Any power outlets are always supplied with the correct plug type.
No tool panel
Tool panel
Tool panel with power outlet
Tool panel type
Choose the type of tool panel that best suits your workspace. The perforated panel is suitable for hooks and other accessories. Any power outlets are always supplied with the correct plug type.
No tool panel
Tool panel
Tool panel with power outlet
Tool panel type
Choose the type of tool panel that best suits your workspace. The perforated panel is suitable for hooks and other accessories. Any power outlets are always supplied with the correct plug type.
No tool panel
Tool panel
Tool panel with power outlet
Tool panel type
Choose the type of tool panel that best suits your workspace. The perforated panel is suitable for hooks and other accessories. Any power outlets are always supplied with the correct plug type.
No tool panel
Tool panel
Tool panel with power outlet
Tool panel type
Choose the type of tool panel that best suits your workspace. The perforated panel is suitable for hooks and other accessories. Any power outlets are always supplied with the correct plug type.
No tool panel
Tool panel
Tool panel with power outlet
Tool panel type
Choose the type of tool panel that best suits your workspace. The perforated panel is suitable for hooks and other accessories. Any power outlets are always supplied with the correct plug type.
No tool panel
Tool panel
Tool panel with power outlet
.
Wall cabinets
Wall cabinet type
Choose from left to right which wall cabinet you would like to add. If you select no wall cabinet, the perforated panel will continue all the way to the top. Wall cabinets can only be installed in combination with a tool panel.
No wall cabinet

Wall cabinet

High wall cabinet with roller door
Wall cabinet type
Choose from left to right which wall cabinet you would like to add. If you select no wall cabinet, the perforated panel will continue all the way to the top. Wall cabinets can only be installed in combination with a tool panel.
No wall cabinet
Wall cabinet
High wall cabinet with roller door
Wall cabinet type
Choose from left to right which wall cabinet you would like to add. If you select no wall cabinet, the perforated panel will continue all the way to the top. Wall cabinets can only be installed in combination with a tool panel.
No wall cabinet
Wall cabinet
High wall cabinet with roller door
Wall cabinet type
Choose from left to right which wall cabinet you would like to add. If you select no wall cabinet, the perforated panel will continue all the way to the top. Wall cabinets can only be installed in combination with a tool panel.
No wall cabinet
Wall cabinet
High wall cabinet with roller door
Wall cabinet type
Choose from left to right which wall cabinet you would like to add. If you select no wall cabinet, the perforated panel will continue all the way to the top. Wall cabinets can only be installed in combination with a tool panel.
No wall cabinet
Wall cabinet
High wall cabinet with roller door
Wall cabinet type
Choose from left to right which wall cabinet you would like to add. If you select no wall cabinet, the perforated panel will continue all the way to the top. Wall cabinets can only be installed in combination with a tool panel.
No wall cabinet
Wall cabinet
High wall cabinet with roller door
Wall cabinet type
Choose from left to right which wall cabinet you would like to add. If you select no wall cabinet, the perforated panel will continue all the way to the top. Wall cabinets can only be installed in combination with a tool panel.
No wall cabinet
Wall cabinet
High wall cabinet with roller door
Wall cabinet type
Choose from left to right which wall cabinet you would like to add. If you select no wall cabinet, the perforated panel will continue all the way to the top. Wall cabinets can only be installed in combination with a tool panel.
No wall cabinet
Wall cabinet
High wall cabinet with roller door
Wall cabinet type
Choose from left to right which wall cabinet you would like to add. If you select no wall cabinet, the perforated panel will continue all the way to the top. Wall cabinets can only be installed in combination with a tool panel.
No wall cabinet
Wall cabinet
High wall cabinet with roller door
Wall cabinet type
Choose from left to right which wall cabinet you would like to add. If you select no wall cabinet, the perforated panel will continue all the way to the top. Wall cabinets can only be installed in combination with a tool panel.
No wall cabinet
Wall cabinet
High wall cabinet with roller door
Wall cabinet type
Choose from left to right which wall cabinet you would like to add. If you select no wall cabinet, the perforated panel will continue all the way to the top. Wall cabinets can only be installed in combination with a tool panel.
No wall cabinet
Wall cabinet
High wall cabinet with roller door
Wall cabinet type
Choose from left to right which wall cabinet you would like to add. If you select no wall cabinet, the perforated panel will continue all the way to the top. Wall cabinets can only be installed in combination with a tool panel.
No wall cabinet
Wall cabinet
High wall cabinet with roller door
Wall cabinet type
Choose from left to right which wall cabinet you would like to add. If you select no wall cabinet, the perforated panel will continue all the way to the top. Wall cabinets can only be installed in combination with a tool panel.
No wall cabinet
Wall cabinet
High wall cabinet with roller door
Wall cabinet type
Choose from left to right which wall cabinet you would like to add. If you select no wall cabinet, the perforated panel will continue all the way to the top. Wall cabinets can only be installed in combination with a tool panel.
No wall cabinet
Wall cabinet
High wall cabinet with roller door
Wall cabinet type
Choose from left to right which wall cabinet you would like to add. If you select no wall cabinet, the perforated panel will continue all the way to the top. Wall cabinets can only be installed in combination with a tool panel.
No wall cabinet
Wall cabinet
High wall cabinet with roller door
Wall cabinet type
Choose from left to right which wall cabinet you would like to add. If you select no wall cabinet, the perforated panel will continue all the way to the top. Wall cabinets can only be installed in combination with a tool panel.
No wall cabinet
Wall cabinet
High wall cabinet with roller door
.
Extras
Adjustable feet
Would you like to level your garage storage system? Then choose adjustable feet. They offer up to 5 cm of adjustment, ensuring your workspace is always stable.
Yes
No
Lighting
These LED strips can easily be attached underneath the wall cabinets using an adhesive strip, providing excellent lighting without complicated installation.
Yes
No
.
Roller cabinet
Fits under the worktop
These roller cabinets fit underneath the worktop and frame and integrate seamlessly into your setup. Please note: they are not visible in the configurator.

Roller cabinet M
.
Drawer contents
Drawer contents
Choose how you want to organise your drawers with drawer dividers. Each drawer divider is suitable for one drawer and helps keep tools and parts neatly organised.

Drawer divider 17 bins

Metal drawer divider

Plastic drawer divider
.
Accessories
Accessories

Tool hook set 16 pcs

Tool hook set 38 pcs

Tool hook set 10 pcs

Storage bins with holder

Screwdriver holder

Spray can holder

Bit holder

Laptop holder

Beeldscherm
View summary
IndividualPrice
PriceExclConversionInstallation
Need help?
Having trouble putting together your workshop setup? Our product specialists are happy to help you with advice on the right configuration, dimensions and available options.
Feel free to contact us via:
Phone number
+442 032 856 368
Available on working days from 09:00 to 17:00
Email address:
[email protected]
We are happy to help you.